How to Create, Modify and Delete Registry Keys Using GPO
The settings the majority of applications and a lot of Windows tweaks are not subject to centralized management using Group Policy (GPO), but often these settings can be configured in the registry. In this article, we’ll consider how to centrally add, modify and delete register keys on the domain computers using Group Policies.
Initially the group policies do not have an integrated feature to manage any register key. So administrators have to use such time-consuming methods like creating their own GPO administrative (.adm / .admx) templates (an example of GPO with .admx template for Google Chrome) or Logon scripts.
In Windows Server 2008, Microsoft released a group policy extension called Group Policy Preferences — GPP. GPP also allow to manage registry parameters, i. e., to add keys, items and their values, as well as delete or change them. Let’s deal with these features in detail.
Suppose, that we need to disable automatic driver update in a certain OU on all PCs by modification ofSearchOrderConfig key inHKEY_LOCAL_MACHINE\SOFTWARE\Microsoft\Windows\CurrentVersion\DriverSearching branch of the registry. There are two ways to set a register key on target computers: using a registry browser integrated in the GPP console on remote computers or manually by selecting the branch and the key. Let’s dwell on the first way to begin with:
- Start Group Policy Management Console (gpmc.msc)
- Create a new (or edit the existing) GPO, assign it to the necessary container (OU) in AD and edit it
- Expand GPO Computer (or User) Configuration -> Preferences -> Windows Settings -> Registrysection and select New -> Registry Wizard in the context menu
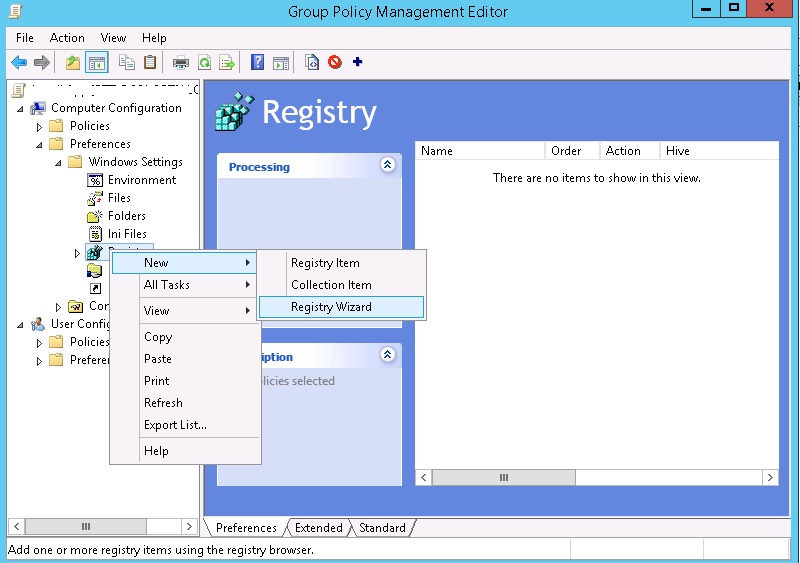
- The Registry Wizard allows to connect to the registry on a remote machine and select the existing registry key
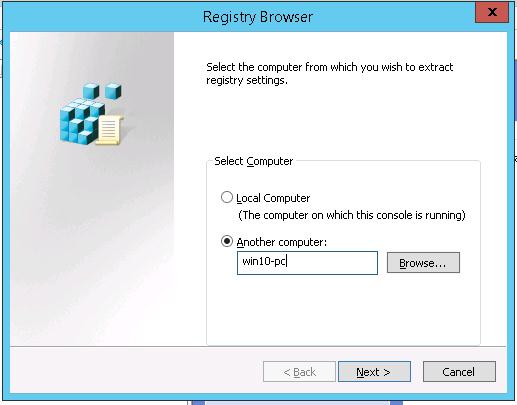
- Specify the remote computer you want to connect to and select the existing key and registry branch
- Using Remote Registry browser, select a key or keys of the registry to be set using GPO.
- In our example we want to import to GPP only one item — SearchOrderConfig.
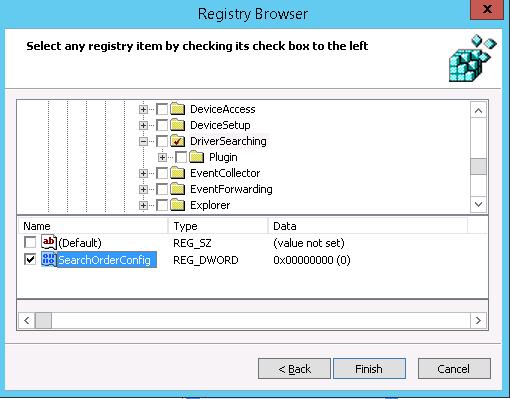
- This item is imported to the GPP console; later you can change its value and the desired action (this will be considered further).
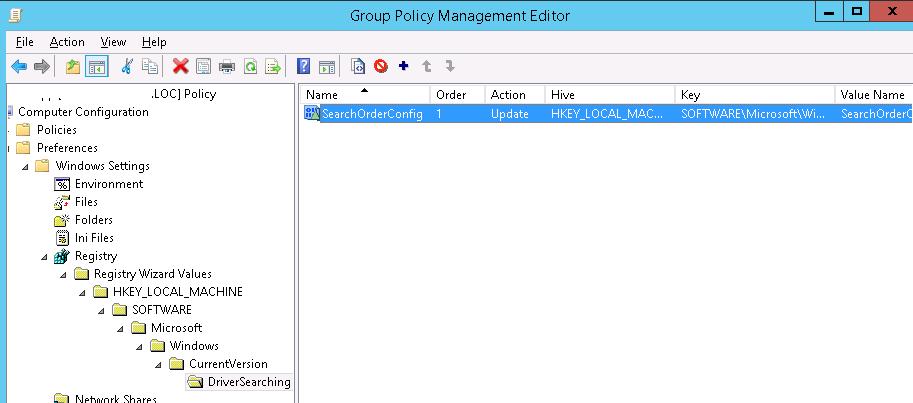
- Thus, you have created a GPP policy and in some time this key will be created on all computers subject to this policy. (If the policy does not work on the client, you can use GPResult for diagnostic purposes.)
You can create, delete or update the value of the registry key using GPP by specifying the registry branch and the key value manually.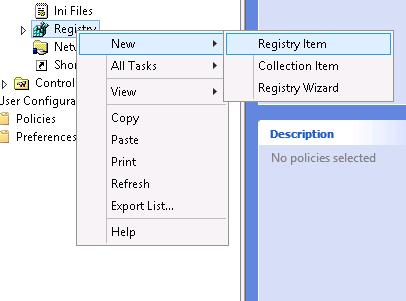
- To do it, select New->Regisrty Item
- In Hive, Key Path, Value Name, Value type, Value data fields, specify the registry hive, branch, name, type and value of the key.

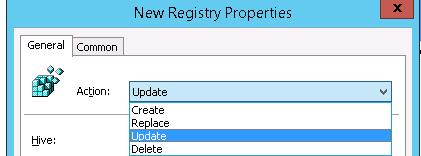
- By default, the key is set in the Update mode.
4 types of actions are available for keys:
- Create creates a registry key. If the parameter already exists, its value is not changed.
- Update (by default) updates the value of an existing parameter according to the GPP. If there is no key, it will be created.
- Replace deletes and creates the registry item anew (rarely used).
- Delete deletes a key.
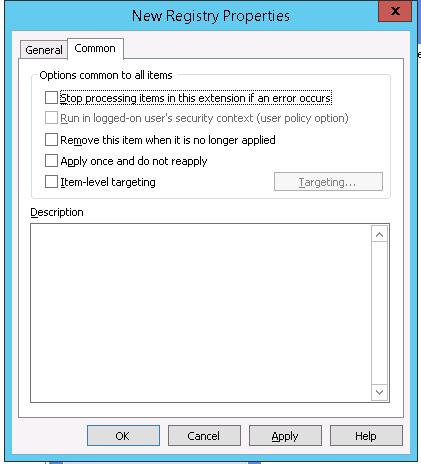
There is a number of other useful features in the Common tab:
- Run in logged-on user’s security context (user policy option) — a key is created only in the current user context. (It is possible only for GPP in the user section of the policies.) If a user doesn’t have the administrator privileges, he won’t be able to write anything to the protected system registry keys
- Remove this item when it is no longer applied – if the policy is no longer applicable to a client, the key is automatically deleted
- Apply once and do not reapply – a policy is applied to a PC only once. Later it won’t be reapplied
- Item-level targeting – the opportunity of more accurate policy targeting on the clients
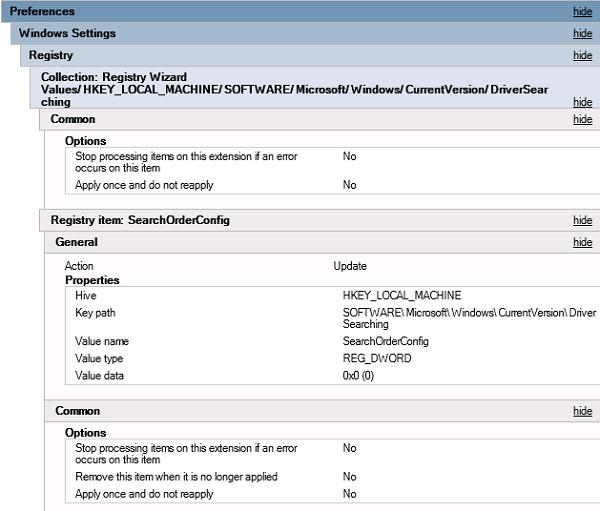
Here is the resulting report containing policy settings in the GPMC.
